About Wowhead

Manual Description Here: Ea eam labores imperdiet, apeirian democritum ei nam, doming neglegentur ad vis.

Recent Post

Ads Inside Post

Alliance War Campaign in Battle for Azeroth

Welcome to Wowhead's Alliance War Campaign Guide! This guide will walk you through all the requirements and steps to fulfill the War Campaign on the Alliance side, as well as detail all rewards you will receive after completing the War Campaign.
Introduction to the War Campaign
The War Campaign is the side storyline that will follow you through your adventures in Kul Tiras, and works in a similar fashion to the Order Hall Storyline from Legion. This time, the War Effort will serve as a continuation for the faction war storyline for Battle for Azeroth, displaying the Alliance's efforts of setting forward operating bases in Zandalar, as well as preparing for strikes upon Horde territory. The War Campaign storyline should expand as the expansion rolls out, so we might even see more content in the future!
War Campaign Reputation Improvements
In patch 8.2.5, all reputation requirements to do the War Campaign were completely removed. You can progress through the whole War Campaign without worrying about the next stage needing reputation.
War Campaign Rewards
The War Campaign is necessary to start several systems in Battle for Azeroth. Here is a list of the rewards you will receive through the first part of the War Campaign:
Access to the Mission Table of Battle for Azeroth, as well as 5 Champions by the time you're done with the Campaign;
Access to the continent of Zandalar;
Access to the War Effort Advancements, equivalent to the Order Hall Advancements of Legion;
Access to the 7th Legion Reputation;
Revered with them is required for  Azerothian Diplomat, required for  Battle for Azeroth Pathfinder, Part One, and Exalted is required to unlock the Dark Iron Dwarf Allied race.
World Quests in Kul Tiras and Zandalar, as well as  Flight Master's Whistle functionality in both Kul Tiras and Zandalar;
At the end of the 8.0 War Campaign, you will receive the achievement  Ready for War;
Ready for War is a requirement for both the  Battle for Azeroth Pathfinder, Part One achievement, and part of the criteria to unlock the Dark Iron Dwarf Allied Race.
At the end of the 8.1 War Campaign, you will receive the achievement  Tides of Vengeance;
Tides of Vengeance is part of the criteria to unlock the Kul Tiran Human Allied Race.
Completing Stay of Execution on any character is required to unlock Tauren Heritage Armor.
At the end of the conclusion to the War Campaign, is the achievement,  The Fourth War, and the title, %s, Veteran of the Fourth War.
Two Sides to Every Tale
Completing  Tides of Vengeance along with the Horde-equivalent  Tides of Vengeance awards two mounts in Patch 8.1.5:
 Ironclad Frostclaw: Captured in the snows of Alterac Valley, this bloodthirsty hunter now roars for the Alliance.
 Bloodflank Charger: Stolen from the Arathi Basin stables, this fire-hearted charger now steeds for the Horde.


Completion Tool
Not sure what achievement criteria you have left for  Ready for War,  The Fourth War and  Tides of Vengeance ?

Simply go to the BFA attunement tracker, hit Load Character, enter in character info, and see what you still have to complete!


Completion Tool
Not sure what achievement criteria you have left for  Ready for War,  The Fourth War and  Tides of Vengeance ?

Simply go to the BFA attunement tracker, hit Load Character, enter in character info, and see what you still have to complete!

8.0 War Campaign Pre-120
The first part of the War Campaign happens during the leveling process. Although it is not required to complete this part while you're leveling, completion of the first steps is required in order to unlock World Quests and a functioning  Flight Master's Whistle in Kul Tiras and Zandalar. Completing these steps also unlocks access to the opposite faction's continent and Island Expeditions.
Level 110: Introduction to the War Campaign
The War Campaign chain starts immediately after you land on Boralus, and choose a zone to start questing on. After being introduced to the war campaign effort located in either of those zones, on the quest  The War Campaign, you will receive your very first quest,  The War Cache. On this quest, you're introduced to  War Resources, the resource used to funnel missions and troops in Battle for Azeroth, and tasked to collect 100 War Resources.

Before level 120, War Resources are pretty scarce, only obtainable by collecting treasure chests in Kul Tiras/Zandalar and as rewards for scattered storyline quests, so this quest might take a bit to be completed. However, this quest will autocomplete once you manage to loot all 100 War Resources. After completing this part, you return to Boralus on  Time for War and receive a hefty sum of Azerite Power.
Introduction to the Mission Table
The next part of the introduction is to this expansion's mission table, located atop the Wind's Redemption. On the quest  Mission from the King, you're formally introduced to the mission table, and receive your first champion, Falstad Wildhammer. You will also receive 100  War Resources back.

Next, on the quest  War of Shadows, you will send Falstad on the mission Shadow of War, which will last 2 hours. After they return from their mission, you will complete War of Shadows and receive the quest  Reinforcements, where you will earn the ability to invoke troops to aid your champions on the mission table's missions.
Levels 110, 114 and 118: Establishing Footholds
The next part of the War Campaign triggers after the introduction, where you can step into enemy territory to establish your first foothold. Footholds are places in the opposite faction's continent that you can access from your faction's boat. After the introduction, you can choose your first foothold to go to, and the other 2 will be available at levels 114 and 118.

The Alliance can choose between footholds in Zuldazar, Vol'dun, and Nazmir. Completing each foothold awards you with access to the zone from the foothold location and a new mission table follower:
Zuldazar: Kelsey Steelspark
Vol'dun: Magister Umbric
Nazmir: John J. Keeshan
After establishing the first Foothold, you will also receive some Azerite Power and the choice of an item level 280 Azerite piece.


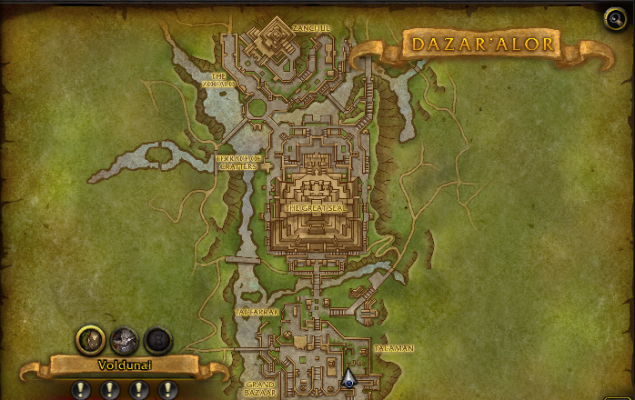
Alliance Footholds in Zandalar
Zuldazar - Xibala
In Zuldazar, you first land at Talanji's Rebuke, and find out the Alliance has been flanked by a Horde fleet. You need to save the survivors on  Granting a Reprieve,  Save Them All,  The Troll's Tale,  That One's Mine and  Disarming the Cannons.

After sorting out the surviving members, you move ahead to the second possible outpost in  Xibala. Arriving there, you find the Dark Iron Dwarves fighting against the Horde to gain access to the foothold, and help them out on  Mole Machinations and  Rocks of Ragnaros. Afterward, you wipe out the Horde opposition with the help of a Fire Elemental from the Firelands on  Fragment of the Firelands. With the outpost in Xibala secured, you go back to Boralus with news of your success.


Vol'dun - Shatterstone Harbor
You arrive by boat at the ruins of Shatterstone Harbor, an ideal place to set a foothold. You first clean out the Sethrak opposition on  Ooh Rah!, and afterward you  Establish a Beachhead in Shatterstone Harbor.

We then go after Sergeant Ermey on  Honor Bound, who went to rescue Private James, captured by the Sethrak. We arrive at Ermey's location, who has a friendly Sethrak, Vorrik, who is dying from poison. We craft the Sethrak an antidote on  Unexpected Aid and  Poisoned Barbs. After healing Vorrik, he offers us safe passage to the Sanctuary of the Devoted, the home of his people, on  Friends in Strange Places. Arriving there, the Sethrak temple is being attacked by a faction of hostile Sethrak, called the Faithless. We help clean up the outskirts of the temple on  Defang the Faithless and  Break the Siege, and rescue Private James on  Breaking Free.

After clearing the outskirts of the Sanctuary, Vorrik tells us the story of the Sethrak people on  The Keepers' Keys, and mentions how Private James unknowingly saved his life, by holding a precious key in his pockets. With an Alliance with the Sethrak created, we return to Shatterstone Harbor to finish the foothold, then return to Boralus.


Nazmir - Fort Victory
In Nazmir, you arrive by boat to the ruins of Fort Victory and find John J. Keeshan and Bronn Bronzebeard as responsible for the foothold. In  Dubious Offering, you go with Bronn to the blood troll settlement of Zalamar, to find Captain Conrad, an officer that got captured by the blood trolls. Arriving in Zalamar, you're trapped in a pit and find out all the Alliance soldiers sent to rescue the Captain became offerings in  Honoring the Fallen, and kill the responsible in  Blood of Hir'eek. Afterward, you fight your way out of the pit in  Zealots of Zalamar, and manage to get back to Fort Victory in  Flight from the Fall.

One of Captain Conrad's colleagues, "Silvermoon" Harry, says she went to  Zul'Nazman. So we arrive there, and we disrupt the blood trolls on our way on  Nazmani Cultists and  Offerings to G'huun. We finally find  Captain Conrad, and in  Lessons of the Damned, we learn that she became mad with power due to the blood trolls treating her as a messenger from G'huun, and we regrettably have to kill her to stop the madness. After this, we simply return to Boralus.


Level 114: War Effort Advancements

At level 114, Alleria Windrunner offer the quest Adapting our Tactics, where you can start researching for War Effort Advancements. These work similarily to the Order Hall Advancements from Legion, where you can research for improvements to help your outdoor world experience. Below are the War Effort Advancements you can research:
Tier 1 - 4 hour research time, 15  War Resources
 Seafarer's Hearth: Harness the power of the sea, reducing the cooldown of your Hearthstone by 40% when used in Kul Tiras and Zandalar.
 Swift Landing: Capture the momentum from your recent flight path, increasing your mounted movement speed by 20% for 5 minutes upon landing.
Tier 2 - 1 day research time, 100  War Resources, requires 3 Champions:
 Upgraded Troop Barracks: Construct a larger barracks for your army, increasing the maximum number of troops you can house by 2.
 Troop Portal Network: Open a portal for transportation of troops from Stormwind, allowing troops to be recruited instantly.
Tier 3 - 1 day research time, 150  War Resources, requires completed Expeditions to 5 different Islands:
 Island Plunderer: Learn the pirate secrets of spotting treasure, granting you a chance to receive additional  Seafarer's Dubloon on Island Expeditions.
 Island Archeologist: Learn the secrets of ancient civilizations, increasing the duration of effects from shrines by 20%.
Tier 4 - 1 day research time, 200  War Resources, requires 5 Champions:
 World Azerite Detector: Construct an Azerite detector on your ship, granting you a chance to find additional Azerite when completing World Quests.
 Local Transportation: Upgrade your Flight Master's Whistle, allowing you to call for a quick flight back to Boralus when using your whistle directly next to a flight master on Zandalar or Kul Tiras.
Tier 5 - 1 day research time, 250  War Resources, requires a Warfront victory against 3 different commanders:
 Warfront Resourcer: Learn more efficient ways to gather resources under pressure, increasing resource gathering speed by 15% while fighting in a Warfront.
 Warfront General: Learn how to best inspire allies in combat, increasing the effectiveness of your recruited troops by 15% while fighting in a Warfront.
Tier 6 - 1 day research time, 500  War Resources, requires  Azerothian Diplomat achievement:
 Alliance Ambassador: Open up additional lines of trade with your new allies, granting additional War Resources from emissary quests.
Level 116: Island Expeditions
Note: These require TWO FOOTHOLDS UNLOCKED as well as Level 116.


At level 116, you will unlock the questline to start Island Expeditions, a new kind of scenario in Battle for Azeroth where you and two other players explore uncharted islands in the seas of Azeroth, in search for precious Azerite. Island Expeditions are the most effective way of grinding Azerite for your  Heart of Azeroth.

To learn more about how Island Expeditions work, and the most effective ways to reap the rewards for your adventures, please check our Island Expeditions Guide!
Level 120: Uniting the Nations
After completing all 3 footholds for your faction, at level 120, you'll receive a new mission from Halford Wyrmbane/Nathanos Blightcaller,  Uniting Kul Tiras. These missions require you to get Friendly reputation with all the factions in Kul Tiras (Proudmoore Admirality, Order of Embers and Storm's Wake).

Completing this quest awards you with World Quests in both Kul Tiras and Zandalar, and it also enables your  Flight Master's Whistle to work in both continents. Like the  Uniting the Isles quest in Legion, you only need to complete the reputation requirements once on your account - Afterward, all you need to do is hit 120 and complete the first steps of the War Campaign to gain access to World Quests on your alts.
8.0 War Campaign: Level 120
After you hit level 120 and unlock World Quests, this is how your  Ready for War achievement should look like (ignore the completed frame portion):
Read More...

The Battle for Lordaeron - Introductory Battle for Azeroth Quests

This guide is an overview for the Battle for Lordaeron scenario releasing on August 7th as part of the 8.0 pre-patch events. This guide covers the quests surrounding the scenario, the scenario itself, as well as the events and story that take place.

WARNING: This guide contains plot spoilers for the scenario!
What is the Battle for Lordaeron?
The Battle for Lordaeron is a pre-expansion scenario that acts as the introduction to Battle for Azeroth. This scenario and its related quests are required to access the content of Battle for Azeroth, similar to the Broken Shore scenario at the beginning of Legion, and has both a Horde and Alliance versions that set up the story for moving into Battle for Azeroth. The scenario only needs to be completed on one character per account. Other characters can pick an option to skip the scenario.

The Battle for Lordaeron takes place after the Horde attack on Teldrassil in the War of Thorns pre-patch event. The Alliance responds by launching an attack on Lordaeron to take control of the city. For info on the War of Thorns and the events leading up to the Battle for Lordaeron, check out this guide about the pre-patch events.

Horde Scenario


You should automatically get the first quest,  Hour of Reckoning, which requires you to speak with High Overlord Saurfang in Orgrimmar. Completing the quest rewards an item level 180 weapon. After talking with him you can get the next quest,  The Battle for Lordaeron, which has you speak with the mage Isabella to his left to queue for the scenario. You will be matched with several other players to complete the scenario together. Many of the key cut scenes are still replaced with placeholders on beta and won't be seen until the scenario launches on live servers. Here is a step by step walkthrough of the scenario:

The scenario begins in the Mage District of Undercity. Speak with Saurfang to advance. After speaking with Saurfang, help with securing the Mage District by defeating SI:7 agents stealthily moving around the area. Once you have defeated enough of them, follow Saurfang on the way to the Heart of the City. You will be interrupted by an ambush from Druids of the Claw which you will have to fight to proceed.


Once in the center of the city, you need to help with the evacuation through defeating more Druids of the Claw or interacting with NPCs to help them escape. After enough helping, a portal will appear towards the center of the room that will take you to the front lines of the battle. Here Sylvanas orders your group to push back the Alliance forces.

Once on the front lines, join the fight and force the Alliance troops back!


A Horde War Machine empowered with Azerite will appear and help push the Alliance forces back even further. In this stage, you must defeat three waves of Alliance forces to defend the Azerite War Machine. Eventually a cut scene will play where Anduin is able to destroy the War Machine. Worried that the Alliance would be able to push back, Sylvanas orders her troops to use the blight. Sylvanas then raises dead troops from both the Horde and Alliance to help with the fight. In this stage you have the choice to pickup up a blight canister and gas mask to use on the Alliance, or just a gas mask. Saurfang urges troops to help the wounded while Sylvanas calls for them to continue attacking. Killing Alliance or interacting with wounded NPCs will cause this stage to progress.
Saurfang: "Soldiers of the Horde! Your brothers and sisters lie wounded on the battlefield! There is no honor in this victory if we abandon our own!"

Sylvanas: "Slay them all, champions! Mark my words, King Anduin and his army did not come here for their amusement. They mean to destroy us! Show them no mercy, for they would show you none in return!"


After a currently unknown cut scene plays where the Horde are pushed back and the Alliance are able to breach the walls of the city, we learn that Saurfang has disappeared and Sylvanas orders Nathanos Blightcaller to lead the troops to intercept the Alliance inside of the city walls. Simply follow him to the next area. The Alliance arrive and consider retreat due to being outnumbered, but the Void Elves join the fight to even the odds. They then charge, and you must fight back against them and the Alliance leaders. The Alliance leaders are very powerful, so be careful when engaging them.


Unable to overcome the Alliance forces, Sylvanas will call for the Horde to retreat. Here you must run from their forces to fall back to the center of the city. Saurfang is there waiting, upset with Sylvanas' use of blight and turning fallen troops undead. After speaking with him, Sylvanas calls for you to follow her into the keep and another still unknown cut scene plays where she escapes the Alliance. Saurfang stays behind to fight the approaching Alliance by himself and is captured.
Saurfang: "I had to see it for myself. Was this your plan all along? Is this how you meant to achieve victory? This... honorless travesty?"

Sylvanas: "Honor means nothing to a corpse, Saurfang. You have the luxury of underestimating death, but it is something with which I am intimately familiar. Maybe you don't care if your people die so long as it is honorable. But to me, this Horde is worth saving. Anyone who disagrees does not deserve to stand among us. So die your warrior's death, High Overlord Saurfang. It means little to me. Perhaps I will raise your broken body to serve me once more. Or perhaps you will have a chance to say hello to your son."
After the scenario is complete, you are teleported back to Orgrimmar where you can talk to Nathanos Blightcaller to trigger the next quest,  A Dying World, which is the beginning of acquiring the  Heart of Azeroth. However, the  Heart of Azeroth is not actually obtainable until the launch of Battle for Azeroth on August 14th. These quests and completing the Battle for Lordaeron scenario leads into the quest line that starts Battle for Azeroth content and sending you to Zandalar.

Alliance Scenario


The first quest leading up to the scenario,  Hour of Reckoning, should appear for you automatically. Go to Stormwind Harbor and speak with Master Mathias Shaw. Completing the quest rewards an item level 180 weapon. He will also give you the next quest,  The Battle for Lordaeron. Talk with Captain Angelica directly to the left to travel to Lordaeron and begin the scenario. You will be matched with several other players to complete the scenario together. Many of the key cut scenes are still replaced with placeholders on beta and won't be seen until the scenario launches on live servers, but we can assume what takes place from datamined information.
You start the scenario by landing on the coast near Lordaeron. Follow General Hammon Clay to meet up with Genn Graymane where he gives a speech before beginning the battle. Genn then leads the charge forward and you must defeat Horde forces to defend the siege towers.
Genn Graymane: "Brothers and sisters of the Alliance, hear me! The Horde's cowardly attack on Teldrassil brought war upon us... and made clear what is truly at stake. Their warchief's goal was not to capture a single city, but to destroy our way of life... and snuff out hope for generations to come. To secure our future, the Banshee Queen must answer for her crimes. Her dark reign ends today! Together we will drive her evil from this land... and raise our banners above Lordaeron once more!"
After defeating enough Horde troops, the Horde's Azerite War Machine enters and you must destroy it. After, a cut scene will play where Anduin is able to deliver the final blow, destroying the War Machine. Sylvanas then orders her troops to begin using the blight and raises dead Horde and Alliance to fight as undead. The Alliance are forced to retreat and you must help defend Anduin from waves of Horde as they deploy the blight as well as help heal Alliance troops along the way. Just before the Alliance are forced to retreat fully, Jaina shows up in a flying ship, her father's ship from Warbringers. She casts frost spells to halt the blight, and then summons arcane cannons to break down the walls of the city.


Once inside the walls, locate Jaina and assist her before moving forward to assault the city where you must fight against a force of Darkspear Trolls and Durja. Durja uses tornadoes and gusts of wind to attack while flying around and must be defeated before you can progress. Defeating enough troops will make him vulnerable to damage.

Follow Anduin into the next clearing to find that the Horde now has the Alliance forces outnumbered. Alleria Windrunner then joins the fight with her army of Void Elves as well as High Tinker Mekkatorque to even the battle. Defeating enough of the Horde forces will cause Sylvanas to call for retreat and detonate blight bombs to prevent you from following.


A group of Gnomish Flying Machines appear to fly you over the blight so you can continue to pursue Sylvanas. Upon reaching the center of the city, you will find Saurfang waiting. Defeating him will trigger a cut scene where, despite wanting to die in battle, Anduin has Saurfang taken to the stockades in Stormwind City. Continue forward with Anduin and the other leaders of the Alliance to chase Sylvanas.
Anduin Wrynn: "Alliance... hold!"

Saurfang: "No! I demand an honorable death!"

Anduin Wrynn: "My father once said that Varok Saurfang embodied the honor of the horde... He admired you for that, and so do I. Listen to me. There is no honor in this."

Saurfang: "That is not for an Alliance king to decide!"

Anduin Wrynn: "At this moment, it is. Take him to the Stockades. When I return, we will speak of honor... and how it may yet be reclaimed."

Saurfang: "If... you return."

After the scenario you will return to the Stormwind docks. Speaking with Halford Wyrmbane nearby will complete the quest and begin  A Dying World, which is the beginning of acquiring the  Heart of Azeroth. However, the  Heart of Azeroth is not actually obtainable until the launch of Battle for Azeroth on August 14th. These quests and completing the Battle for Lordaeron scenario leads into the quest line that starts Battle for Azeroth content and sending you to Kul Tiras.
Ending Cinematic
Click here for our analysis of the Lordaeron cinematics and speculation on where Sylvanas' story could go next.


Here is a transcription of the Horde cinematic:
Baine: You abandoned Saurfang to die out there.

Sylvanas: It is the death he wanted. If that troubles you, you're free to join him. Or you can tend to the living. The choice is yours.

Baine: For the Horde.

Sylvanas (to Nathanos): You know what must be done. Go, my champion.

He says nothing, but seems hesitant, moving slowly out of the throne room.

Sylvanas then moves to lounge in the throne room chair as the Alliance enters.

Sylvanas: Look at you! The boy is playing soldier.

Genn: Our king just routed your army!

Sylvanas: Muzzle your dog, Your Majesty.

Anduin: Sylvanas Windrunner, you have led the Horde to a place without honor. Lordaeron is ours. It's over.

Sylvanas: Your father would be so proud. Is that his? You've gotten it all bloddy.

Anduin: Only one of us wanted this war.

Sylvanas: You call for peace when it suits you, little lion, but you're quick enough to kill.

Alleria: I should have killed you when last we met.

Sylvanas: How rude, sister! You're a guest in my home!

Genn: Your home? You descrate that throne with your filth!

Anduin: Enough! You put the torch to Teldrassil, but I failed those who burned. I will not make that mistake again. Surrender, or die.

Sylvanas: You've won...nothing.

She then goes into banshee form, exploding blight canisters everywhere and destroying Undercity.

Jaina then creates a protective arcane bubble, and everyone escapes on the ghost ship.

The cinematic ends with the Horde on the gunship and the Alliance on the Kul Tiras ship, looking down on the destruction below.

Aftermath
The battle ends up leaving Lordaeron and Undercity completely uninhabitable due to large amounts of blight completely covering the area. The zones will no longer be accessable after completing the scenario and the NPCs from the area will move to Orgrimmar. The area around Lordaeron changes too, becoming war-torn to reflect the massive battle that took place there. You can still revisit the zone by speaking with Zidormi to go back in time to before the Battle for Lordaeron events. This is done similarly to previous zones such as Theramore or Silithus.


Read More...

Azerite Armor Overview and FAQ

The  Heart of Azeroth was given to players by Magni Bronzebeard which unlocks the ability to unlock Azerite Traits on specific pieces of gear called Azerite Armor. This guide provides an overview of Azerite Armor and how to unlock and change Azerite Traits on your equipment, updated for patch 8.2: Rise of Azshara and Season 3.

For more information on Azerite Armor and the  Heart of Azeroth, check out our list of Azerite Traits and Heart of Azeroth Overview.

Click here for Wowhead's Azerite Finder to find gear with your favorite traits and how to get it.

Also check out our Azerite guides and recommendations for all specs:
Blood Death Knight Arcane Mage Assassination Rogue
Frost Death Knight Fire Mage Outlaw Rogue
Unholy Death Knight Frost Mage Subtlety Rogue
Havoc Demon Hunter Brewmaster Monk Elemental Shaman
Vengeance Demon Hunter Mistweaver Monk Enhancement Shaman
Balance Druid Windwalker Monk Restoration Shaman
Feral Druid Holy Paladin Affliction Warlock
Guardian Druid Protection Paladin Demonology Warlock
Restoration Druid Retribution Paladin Destruction Warlock
Beast Mastery Hunter Discipline Priest Arms Warrior
Marksmanship Hunter Holy Priest Fury Warrior
Survival Hunter Shadow Priest Protection Warrior

What is Azerite Armor?
Azerite Armor is a new addition to Battle for Azeroth which allows you to use your  Heart of Azeroth to empower it. Azerite Armor will drop in 3 slots for the entire expansion of Battle for Azeroth -- Chest, Helm and Shoulders.

Each piece of Azerite Gear will have no secondary stats but increased primary stat allocation from previous expansion items. It will also always drop at the base item level and cannot Warforge, Titanforge or roll any tertiary stats.

In addition, each piece will have a number of rings, each containing multiple Azerite Traits which will augment your spec by empowering or modifying existing spells. These Azerite Traits are not random -- on two pieces of the same shoulders, the Azerite Traits will always be the same and will not change. These Azerite Traits can be seen through the Dungeon Journal In-Game or searching up the piece on Wowhead!
Sources of Azerite Armor
Azerite Armor can be obtained from the same sources as other pieces of gear -- this includes World Quests, Dungeons, Raids and more. However, Azerite Armor that is item level 370 and higher will only drop from drop from content with lockouts. This limits the rate that players can earn the most powerful pieces, in order to keep players from farming hundreds of Mythic+ dungeons in order to get all of their best Azerite Armor pieces within the first week. Keep in mind that Azerite armor also cannot Warforge.

Beginning in Season 2, newly obtained item level 370+ Azerite Armor will contain a 5th ring of specialization specific Azerite Powers (2 per spec), excepting armor obtained from Uldir.

Open World
World Quests: scales up to 385
Exalted factions: 355
Kul Tiras and Zandalar World Bosses: 355
Nazjatar Benthic gear: 385-425
Nazjatar World Bosses: 415
Daily Emissaries: scales up to 415
Faction Incursions: scales up to 415
Warfront
Each Victory: 340
Arathi Rares: 340
Darkshore Rares: 355
Arathi Highlands World Boss: 370

Stromgarde Warfront Quest: 370
Darkshore World Boss Ivus: 400
Darkshore Warfront Quest: 400
Heroic Stromgarde Warfront Quest: 430
Dungeon
Normal Dungeons: 370
Heroic Dungeons: 385
Mythic Dungeons: 400
Operation: Mechagon: 415
Mythic+ Weekly Chest drops Titan Residuum
Raid
Raid Finder Uldir: 340
Normal Uldir: 355
Heroic Uldir: 370
Mythic Uldir: 385
Raid Finder Dazar'alor: 370
Normal Dazar'alor: 385
Heroic Dazar'alor: 400
Mythic Dazar'alor: 415
Raid Finder Eternal Palace: 400
Normal Eternal Palace: 415
Heroic Eternal Palace: 430
Mythic Eternal Palace: 445
PvP
End of Match rewards: 400-435
Weekly PvP Cache: 415-445
Titan Residuum
 Titan Residuum earned from the weekly Mythic+ Cache and scrapping Azerite Armor can be spent to purchase random item level 385, 400, and 415 Azerite tokens for each armor type, or specific item level 415 items, drawn from the Dungeon loot table. This allows you to obtain competitive versions of those items, and prioritize what items or armor types you need to suit your current gearing. In general, it's best to buy the cheaper random tokens instead of saving up for a specific piece, especially if you do not already have 415 gear and unless you already have a competitive item in each slot.
Random item level 415 tokens cost 1,725  Titan Residuum
Random item level 430 tokens cost 9,000  Titan Residuum
Random item level 445 tokens cost 47,500  Titan Residuum
A specific item level 445 armor piece costs 200,000  Titan Residuum
How does Azerite Armor Work?
Each piece of Azerite Armor is separated into 3 or 4 rings.
Azerite Armor under item level 340 will only have 3 rings.
Azerite Armor item level 340 or higher will have 4 rings.
Azerite Armor item level 370 or higher will have 5 rings
Each ring will allow you to choose one of the Azerite Traits on it and selecting it will rotate the ring so that your chosen Trait is shown at the top! These rings can be seen by Shift-Right Clicking on the piece of Azerite Armor. The effect of Azerite Traits will scale based on the item level of the Azerite Armor -- A higher item level will make the effect of the Traits stronger!

The rings unlock one-by-one from the outside to the center. We'll use this color-coded image to explain what each ring contains.

To see the specific traits, see our Azerite Traits Guide.

Fifth Ring - Specialization Traits
The outermost fifth ring, found only on item level 370+ Azerite Armor obtained after the start of Season 2, contains two traits for each specialization to choose from. This allows the player up to 3 extra primary traits, for a total of 6 active traits (up from 3 in Season 1).
Blue Ring - Primary Traits
The Blue Ring will always contain Spec Traits and 1 Location Trait. If you have a piece of Azerite Armor with 5 rings, you will have two of these rings providing spec traits.
The Location Trait is determined by how the item was acquired.
The options are the zone, such as dungeons, raids, PvP, Engineering, and the like.
On the 4th ring, there is one Spec Trait for every spec of your class and one Location Trait, for four options total.
For Demon Hunters, there will be two spec traits (one for Vengeance, one for Havoc) and for Druids, there will be four spec traits.
On the 5th ring, there are two Spec Traits for every spec of your class, for six options total.
For Demon Hunters, there will be four spec traits (two for Vengeance, two for Havoc) and for Druids, there will be eight spec traits.
Some Spec Traits can be picked in another spec.
Green Ring - Role Traits
The Green Ring will only be present on pieces of item level 340 or higher and will offer the choice of 3 Role Traits.

This possible traits in this tier will change based depending on your class and if your class contains a spec that can Heal and/or Tank.
Role-Enhancing Traits provide the option of Offensive Traits for DPS, Defensive Options for Tanks and Healing Options for Healers.
Many traits will overlap between DPS, Tank and Healing, such a Primary or Secondary Stat passive buffs.
Unlike the Blue Ring, you can choose Traits that are not intended for your current specialization. If you want to be a more offensive Healer or Tank, you can choose the offensive options.
If you are a pure DPS class, you will not have the healing or tanking traits. Similarly, a priest will not have the tanking traits.
Yellow Ring - Defensive Traits
The Yellow Ring will always contain a choice of 2 Defensive Traits.
Most of these Defensive Traits are generic, but there are two class-specific Defensive Traits for every class.
Defensive Traits can be in the form of damage reduction, absorb shields or heals.
Center Trait - Empowerment
The Center is the same for every piece of Azerite Armor, which adds +5 item levels to the piece of gear, increasing the amount of stats and the value of the other Azerite Traits contained within.
Requirements for Unlocking Traits
In order to unlock each Ring of Azerite Traits, your  Heart of Azeroth must be a certain level, with higher item level gear requiring a higher level Heart. Each subsequent has a greater requirement, culminating in the central Empowerment trait. The current cap is Heart level 50.

Want to know what level your  Heart of Azeroth needs to be to unlock your traits? Match the type and item level of a piece to the Tables below. Lower item level gear from Season 1 sources is listed in the toggle below.

Helm

Item LevelSpec RingPrimary RingRole RingDefensive RingEmpowerment
3701526303438
3851529323538
4001530343842
4151531364146
4301531364158
4451531364163

Shoulders

Item LevelSpec RingPrimary RingRole RingDefensive RingEmpowerment
3701528323640
3851531343740
4001532364044
4151533384348
4301533384360
4451533384365

Chest

Item LevelSpec RingPrimary RingRole RingDefensive RingEmpowerment
3701527313539
3851530333639
4001531353943
4151532374247
4301532374259
4451532374264

Season 1


Reforging Azerite Armor
Sometimes, the traits you chose aren't exactly great for the next boss fight, or maybe you just want to try a new combination. You won't be able to change your traits out in the world, but you can visit an Azerite Reforger in Boralus or Zuldazar to remove all current Azerite Traits from the piece.
Location of Azerite Reforger
Alliance

The Alliance Azerite Reforger is located in the Tradewinds Market, Boralus. Alliance players will have a short run to the Azerite Reforger!


Horde

The Horde Azerite Reforger is located in the Grand Bazaar, Dazar'alor. Horde players will have a long run and will need to take a flight path from the main hub down to the docks.


How to Reforge

When you talk to an Azerite Reforger, you will open a new UI that allows you to place a piece of Azerite Armor in the slot.

reforge.png


Reforging your Azerite Armor will cost Gold every time and double for every reforge regardless if it's the same or different piece. The base price is 5 which is relatively cheap, but it quickly scales to become expensive.
5 - 10 - 20 - 40 - 80 - 160 - 320 - 640 - 1280 - 2560 - 5120 - 10240 - 20480 - 40960 - 81920 - 163840...
Read More...